-
[Swift] Building Instgram (1)(2)공부 기록/Swift 2021. 7. 4. 18:09728x90
튜토리얼 영상
https://www.youtube.com/watch?v=Yv62q3c3UxI

kakao@sophiawingsui-MacBookPro Instgram % git init
kakao@sophiawingsui-MacBookPro Instgram % git add .
kakao@sophiawingsui-MacBookPro Instgram % git commit -m "First commit";
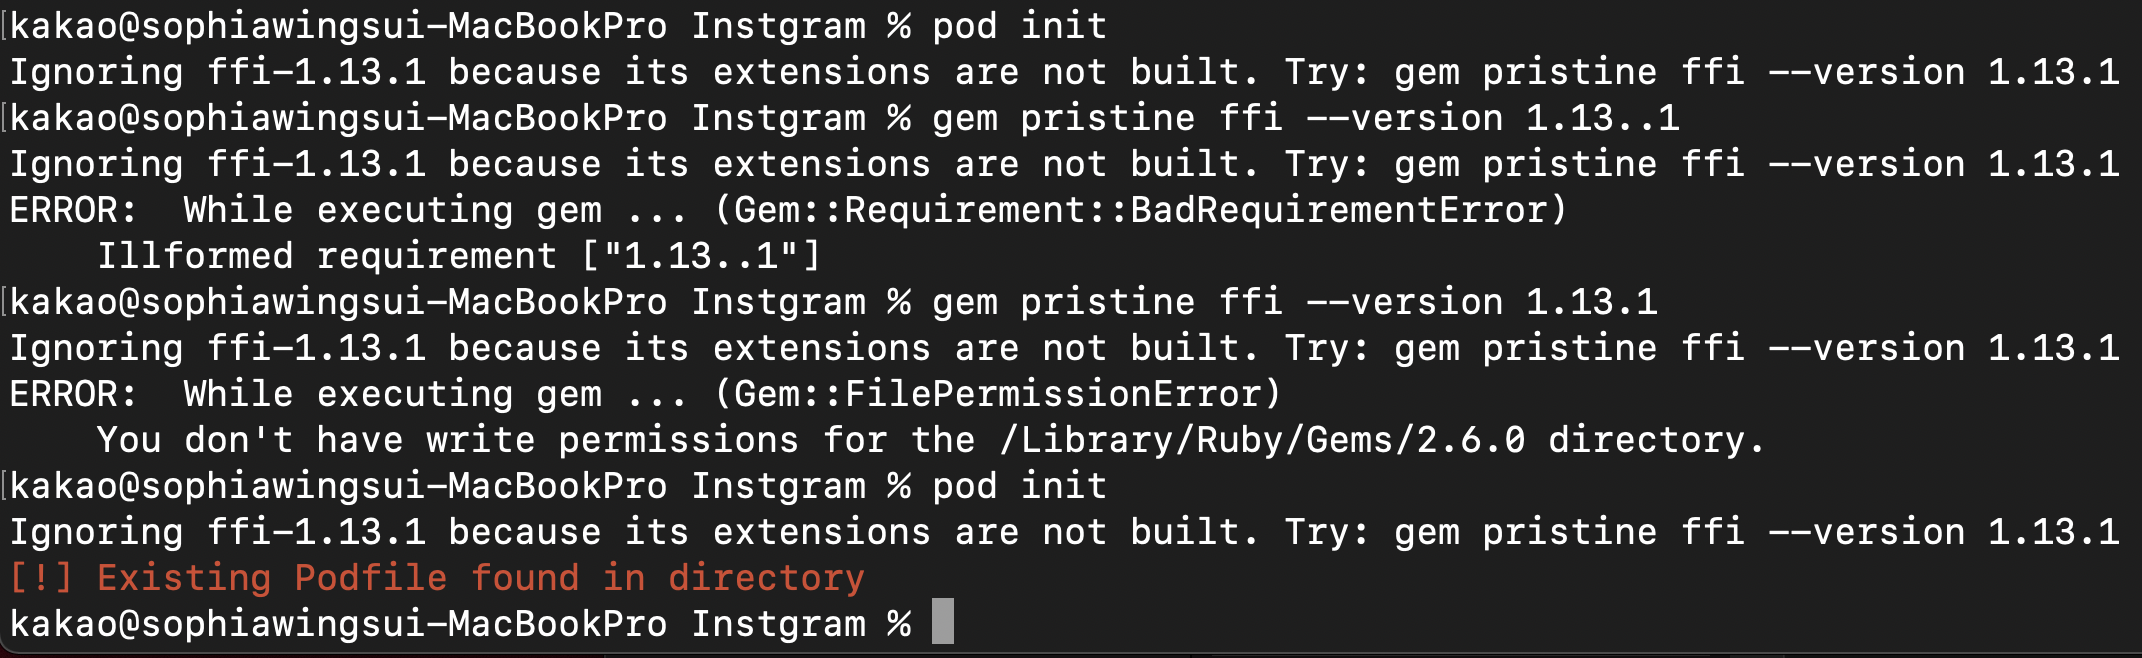
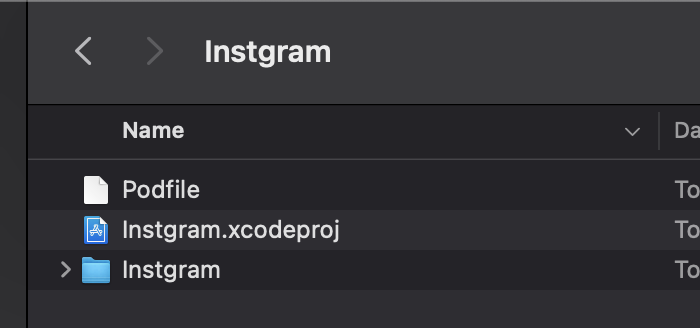
pod init 하고 에러가 발생하는 듯하였지만 해당 프로젝트 폴더에 pod 파일 생성완료


Troubleshooting
[해결법 포함] 초기뷰컨트롤러 선언 에러(Failed to instantiate the default view controller for UIMainStoryboardFil
2020-01-13 14:44:29.197209+0900 YoungWord[2743:123327] [WindowScene] Failed to instantiate the default view controller for UIMainStoryboardFile 'Main' - perhaps the designated entry point is not set..
fomaios.tistory.com
git add에 대한 내용은 git관련 문서 참고
https://www.youtube.com/watch?v=jRB7CGSu63E
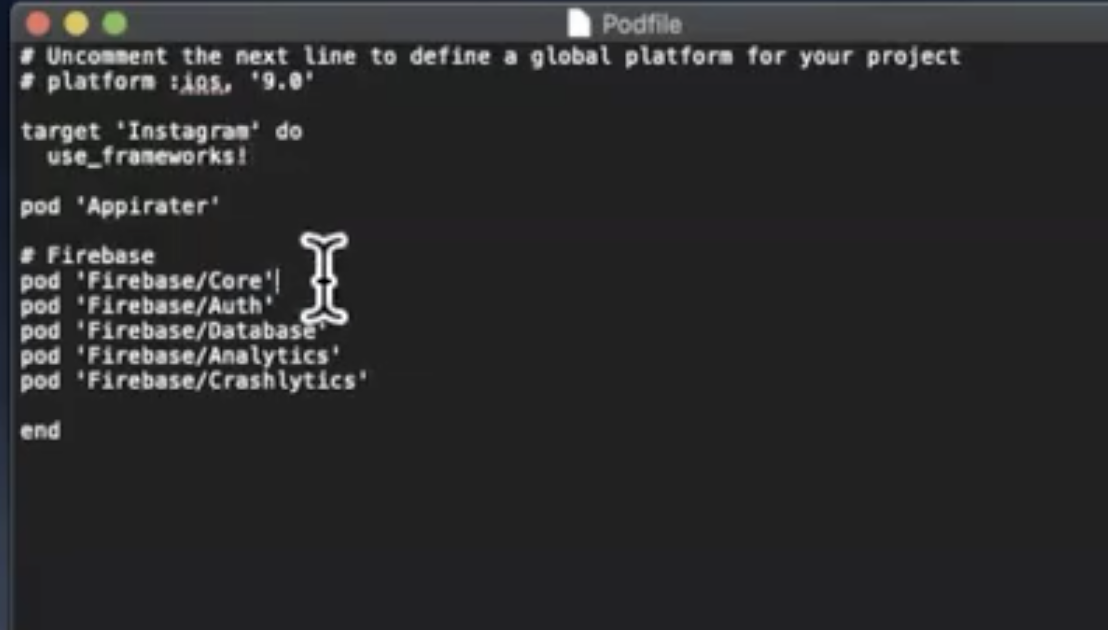
이렇게 pod 파일을 설정했는데, 자꾸 오류가 났다.
[!] `FirebaseAnalytics` requires CocoaPods version `>= 1.10.0`, which is not satisfied by your current version, `1.9.3`.Troubleshooting
pod 버전 확인: pod --version 버전이 낮아서 아래와 같이 업데이트 (참고)
cocopods 업데이트:
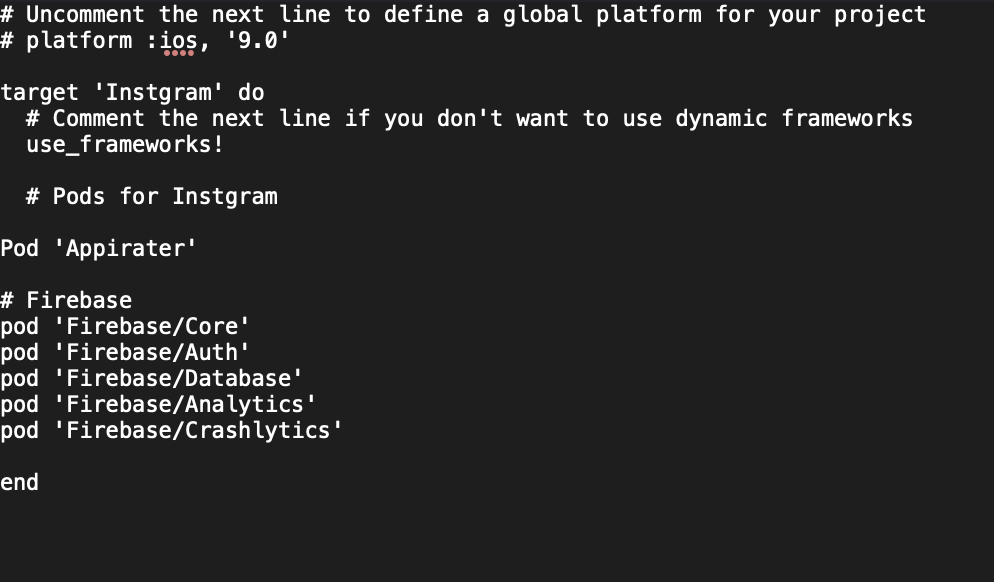
brew install cocoapods brew link --overwrite cocoapods문서에서 안내해준 Prerequisite에 따라, iOS 버전을 10으로 타게팅하도록 pod 파일 변경. (참고)
그러고나서 pod install을 하니, 성공적으로 설치가 되었다.

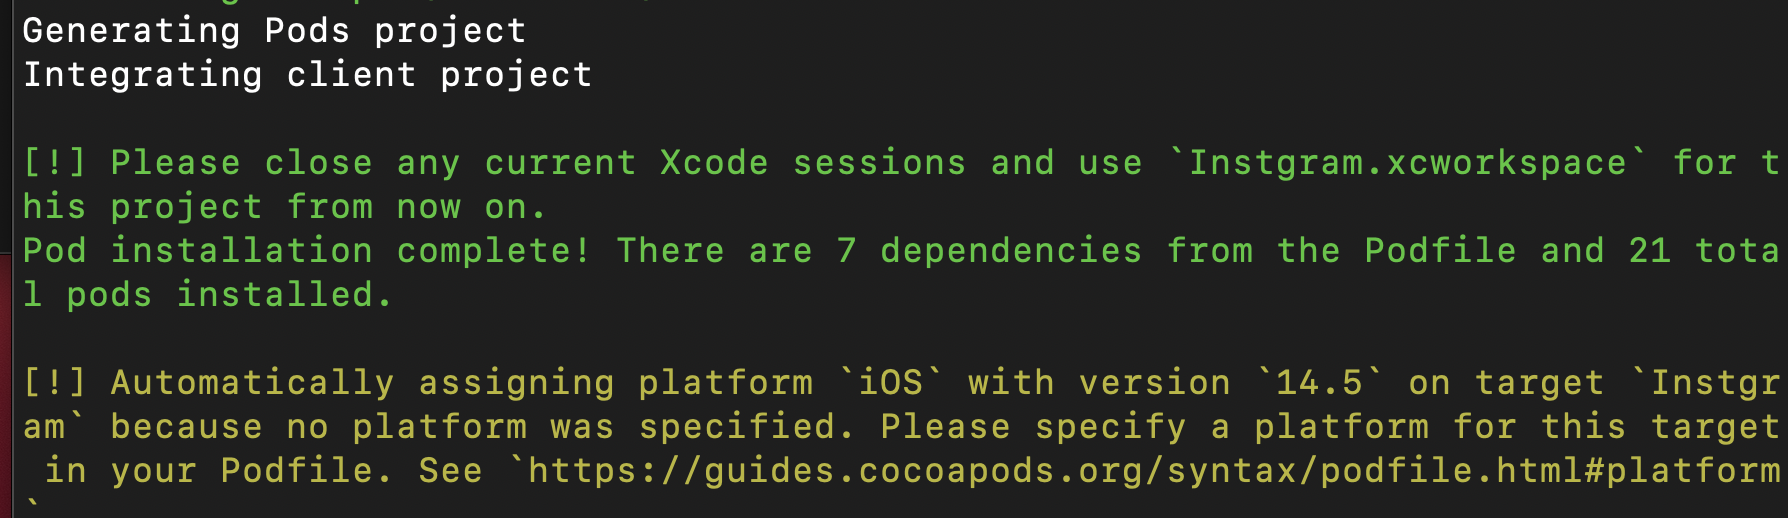
이렇게 디펜던스 설정 완료!
설치가 완료된 후에야 해당 명령어로 프로젝트 열 수 있었음
kakao@sophiawingsui-MacBookPro Instgram % open Instgram.xcworkspace/
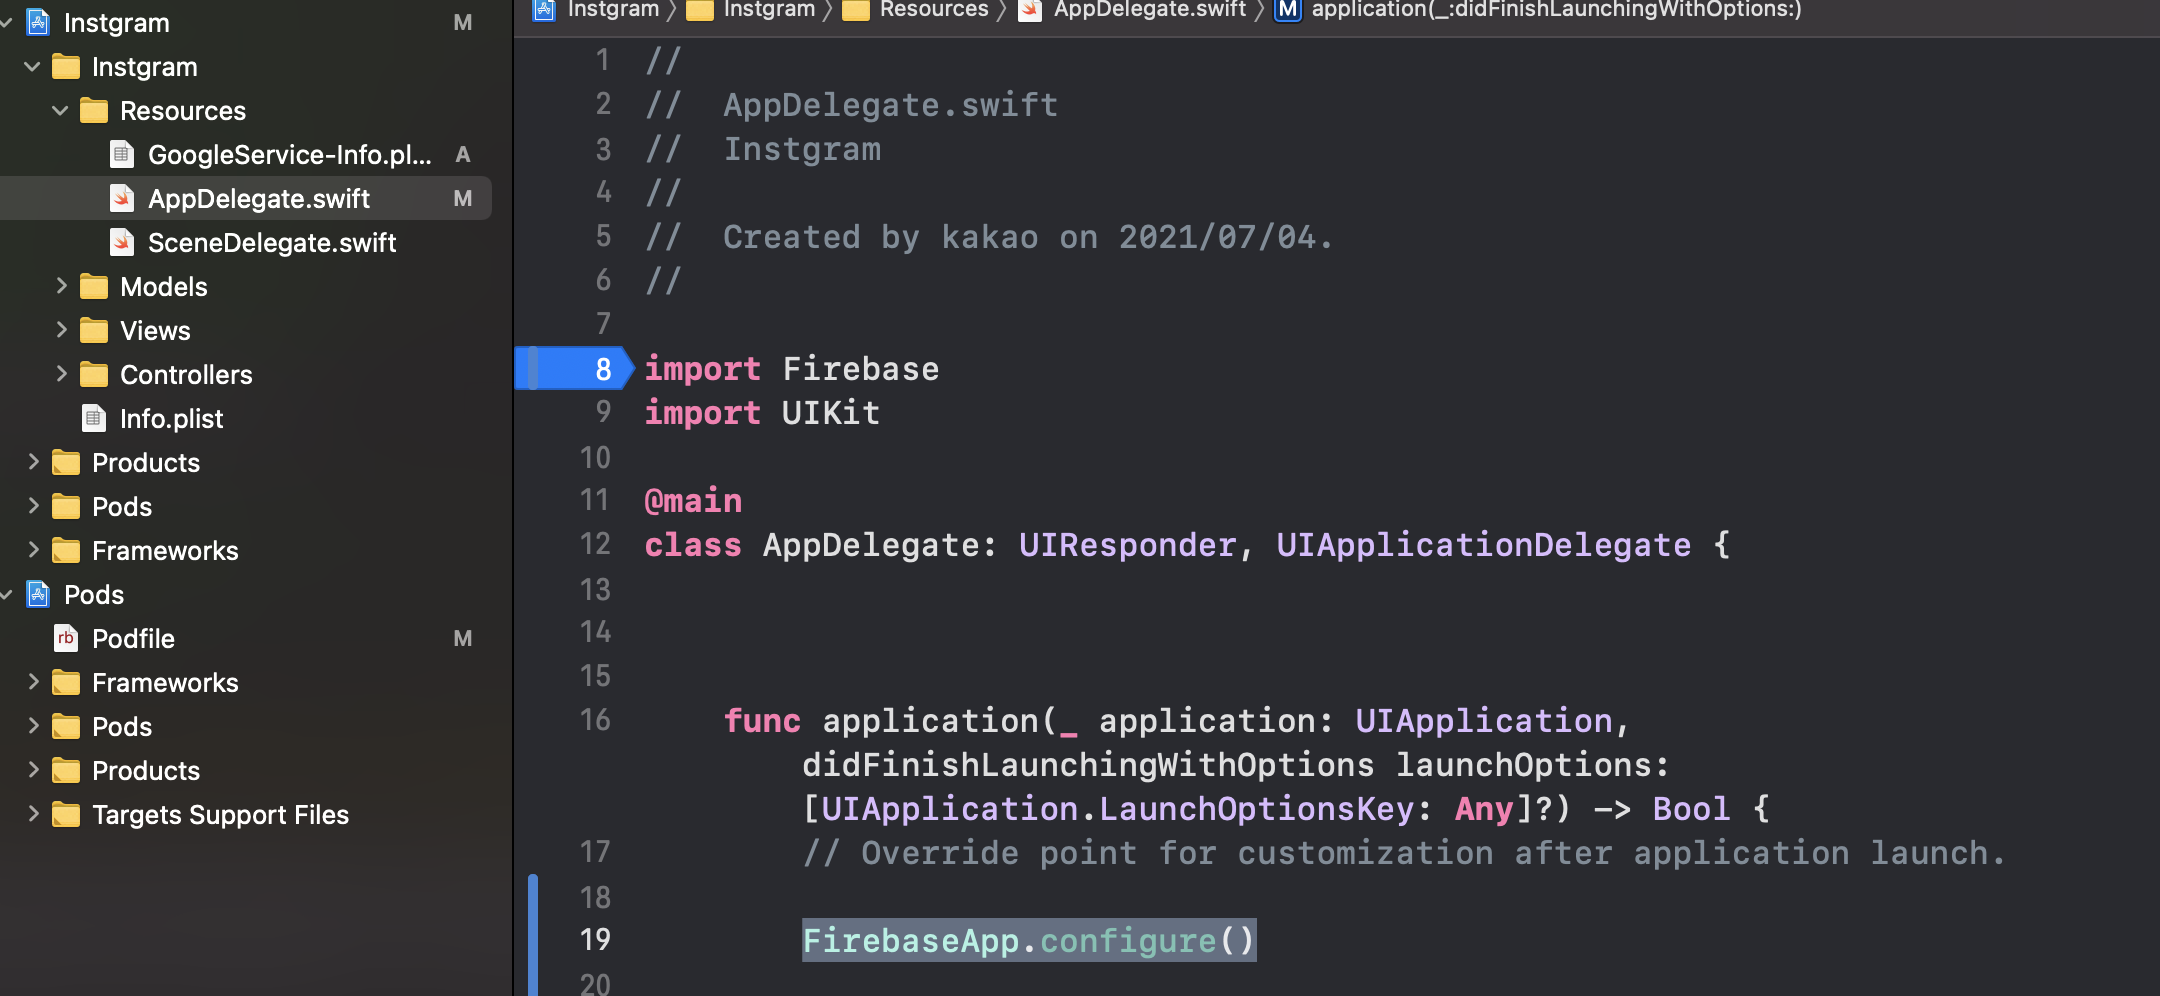
Firebase import하고 코드 추가. >> Firebase에 ios 앱을 등록하는 과정에서 각 단계마다 pod 파일과 xcode project에 어떤 설정, 어떤 코드를 추가해야하는지 알려주어서 좋았다.
여기까지 성공적이었으나, Firebase에서 다운로드 받은 Info.plist 파일을 다운로드 받은 후, build 했더니 오류가 났다.
Troubleshoot
빌드하는 과정에서 "Thread 1: breakpoint 1.1" 에러 발생 -> https://teamtreehouse.com/community/thread-1-breakpoint-11help-in-xcode참고해서 해결
What I have learned
이제 본격적인 코드 작성... 중에 자주 등장하는 요소들에 대해 공부
- viewDidLoad: https://etst.tistory.com/90
[iOS 앱 개발 - Swift] 뷰의 상태변화 감지
오늘 볼 내용으로 View Controller를 새로 만들어주면 항상 기본적으로 들어있던 viewDidLoad 메서드가 어떤 역할을 하는지 알 수 있게 될 것 같네요! 그 밖에도 화면이 바뀌는 순간 뒤에서는 어떤 작업
etst.tistory.com
- 싱글턴: https://babbab2.tistory.com/66
Swift) 싱글톤 패턴(Singleton Pattern)
안녕하세요 :) 소들입니다 이번 포스팅에선 싱글톤 패턴이 무엇이고, Swift에선 어떻게 사용되는지에 대해 알아보려고 해요!!! 왜 네트워크 하다가 갑자기 SingleTon이냐 하면 내 마음임 모든 포스팅
babbab2.tistory.com
https://github.com/firebase/firebase-ios-sdk/issues/8137를 참고해서 pod 업뎃도 해보았지만 여전히 안된다.
pod update그러던 중에 나랑 같은 문제를 겪은 사람의 글 발견(https://github.com/firebase/firebase-ios-sdk/issues/8137)
Had the same issue, XCode -> Product -> Clean Build Folder fixed it. 이걸로 해결했다.
그러고 나서 로그인창을 구현하기 위한 코드 작성 완료.
코드를 분석해보자.
import UIKit

class LoginViewController: UIViewController {

    private let usernameEmailField: UITextField = {
        return UITextField()
    }()

    private let passwordField: UITextField	= {
        let field = UITextField()
        field.isSecureTextEntry = true
        return field
    }()

    private let loginButton: UIButton = {
        return UIButton()
    }()

    private let termButton: UIButton = {
        return UIButton()
    }()

    private let PrivacyButton: UIButton = {
        return UIButton()
    }()

    private let createAccountButton: UIButton = {
        return UIButton()
    }()

    private let headerView: UIView = {
        return UIView()
    }()


    override func viewDidLoad() {
        super.viewDidLoad()
        addSubViews()

        // Do any additional setup after loading the view.

        view.backgroundColor = .systemBackground
    }

    override func viewDidLayoutSubviews() {
        super.viewDidLayoutSubviews()

        //assign frames
    }

    // https://developer.apple.com/documentation/uikit/uiview/1622616-addsubview
    private func addSubViews() {
        view.addSubview(usernameEmailField)
        view.addSubview(passwordField)
        view.addSubview(loginButton)
        view.addSubview(PrivacyButton)
        view.addSubview(termButton)
        view.addSubview(headerView)
        view.addSubview(createAccountButton)

    }

    @objc private func didTapLoginButton(){

    }
    @objc private func didTapTermsButton(){

    }
    @objc private func didTapPrivacyButton(){

    }
    @objc private func didTapCreateAccountButton(){

    }


}
addSubview에 대한 문서 // https://developer.apple.com/documentation/uikit/uiview/1622616-addsubview
Apple Developer Documentation
developer.apple.com
@objc private func >> 요것은 무엇을 하는지 알아봐야겠다.
'공부 기록 > Swift' 카테고리의 다른 글
[Swift] Building Instgram (3) (0) 2021.07.05